
Once users have added their time entries, you can automatically lock the timesheet after a specified number of days. That means regular users can't add, edit or delete time after that set number of days, helping prevent both accidental and intentional changes.
This is particularly useful when time entries have already been included in invoices, reports, or other documents sent to clients, ensuring that the recorded time remains accurate and consistent.
Enable Timesheet Locking
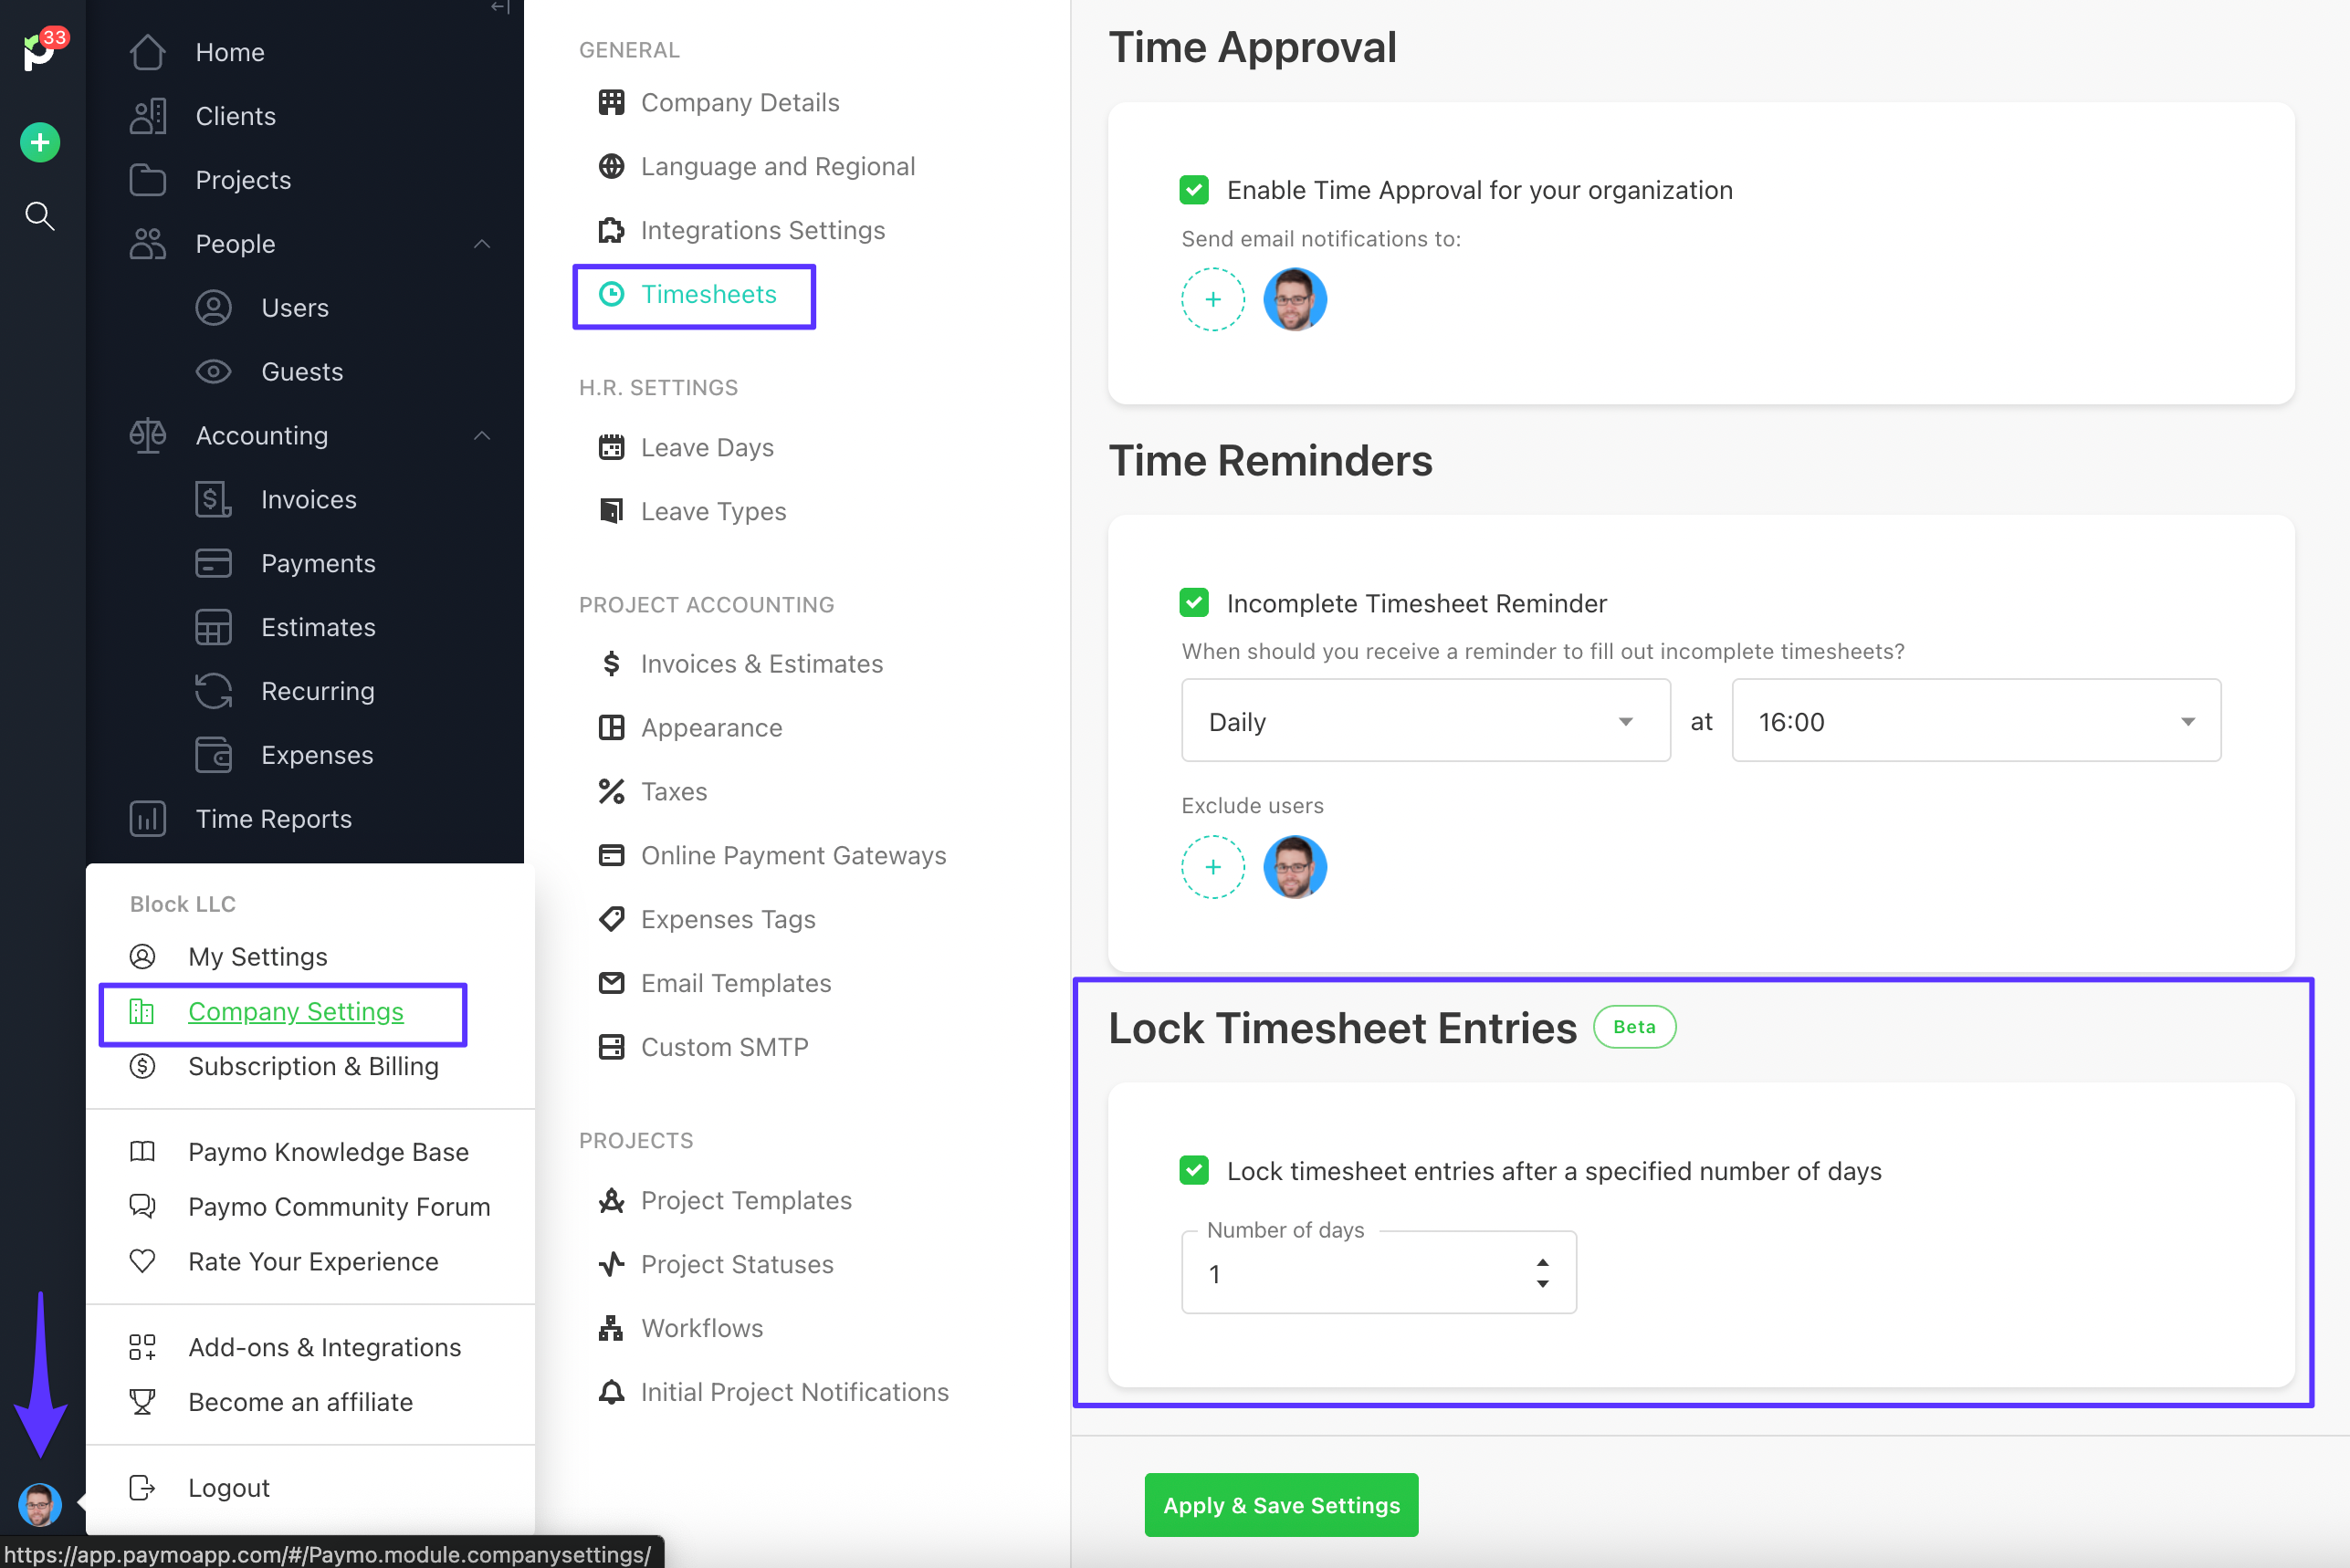
To enable this option:
Go to Company Settings → Timesheets.
Scroll down to the Lock timesheets option.
Select the number of days after timesheets should be locked.
Once enabled, timesheets will be automatically locked after the selected period, preventing further changes to the submitted time entries.